

The quickest answer: empty the tank, wipe it out with a soft cloth, and let it dry completely after every session. On top of that, run a short white-vinegar cycle through the tank on a schedule — weekly if you diffuse every day, monthly if you diffuse a few times a week — to clear the residue a cloth cannot reach. No special tools, no harsh chemicals.
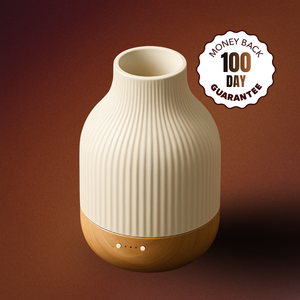
On Scentreat's two ultrasonic models — the Ceramic & Rubber Wood Diffuser (180 ml tank) and the Minimalist Wood Diffuser (200 ml) — that deep-clean is 10 drops of white vinegar in a half-full tank, run for 5 minutes, then a swab of the plate and a lid-off air-dry, exactly as in the vinegar method below. The waterless CalmRide and the Night Light in waterless mode have no water to clean: a rubbing-alcohol swab of the atomizer when you switch oils is the whole routine.
Cleaning routines differ by machine — check which one you own in the diffuser types guide.
In this guide, Scentreat covers how to clean an essential oil diffuser step by step for every type, including the vinegar deep-clean method, how often to clean, what to avoid putting inside your diffuser, and which oils to never leave sitting overnight.
Not Every Diffuser Needs the Same Cleaning Method

Different diffuser types use different mechanisms to release scent, which directly affects how residue builds up and how they should be maintained.
Some diffusers mix water with essential oils; others use pure oil, airflow, or heat. These differences determine how often cleaning is needed and what method works best to avoid buildup or damage.
Understanding how your diffuser works is the first step in keeping it clean safely and efficiently. The right approach protects the internal components and keeps your scent consistent session after session.
The Main Types of Diffusers and How Cleaning Differs
Here are the five types you are most likely to own, and what each one asks of you between sessions.
Not sure which you have? Check what goes in it: water plus a few drops of oil means ultrasonic, neat oil and no water means nebulizing, a pad or filter means evaporative, a warming dish or tealight means heat, and a bottle of reeds has no machine to clean at all.
1. Ultrasonic Diffusers

Ultrasonic diffusers use water and high-frequency vibrations to create a fine mist that carries essential oils into the air. Because the oil is diluted, residue builds up more gradually compared to waterless systems.
Cleaning impact
- Needs light cleaning after regular use
- Occasional deep cleaning helps maintain mist performance
- Smooth surfaces make wiping and rinsing quick and easy
Pros
- Soft, even scent that stays comfortable over time
- Easier to clean compared to more concentrated systems
- Suitable for daily use without complex maintenance
Cons
- Requires regular upkeep to prevent residue
- Needs water refilling for each use
For most users, ultrasonic diffusers offer the best balance between performance, comfort, and ease of cleaning — making them especially well-suited for everyday use.
2. Nebulizing or Waterless Diffusers

Nebulizing diffusers disperse pure essential oil directly into the air without dilution, creating a strong and immediate scent. Because they use undiluted oil, residue tends to build up more quickly, especially in narrow internal components.
Cleaning impact
- Requires more frequent and careful cleaning
- Often needs rubbing alcohol to dissolve oil residue
- Internal parts can be harder to access and maintain
Pros
- Strong, noticeable scent output
- No water needed
- Works well in larger spaces
Cons
- Uses oil quickly
- More complex cleaning process
- Can feel intense in smaller environments
3. Evaporative or Fan Diffusers

Evaporative diffusers use airflow to spread scent from a pad or filter. Since oil is absorbed into replaceable materials, buildup inside the device is minimal — but maintenance still depends on replacing those components regularly.
Cleaning impact
- Minimal internal cleaning required
- Pads or filters need to be replaced over time
- Exterior should be wiped to prevent residue
Pros
- Easy to use with simple setup
- Low maintenance overall
- Lightweight and often portable
Cons
- Scent can be inconsistent
- Fragrance fades faster
- Less control over intensity
4. Heat and Candle Diffusers

Heat diffusers use a warming element or candle to release fragrance. Heat can cause oils to thicken or leave behind residue, especially with repeated use.
Cleaning impact
- Requires regular wiping to remove oil buildup
- Residue can become thicker over time
- Needs careful handling due to heat exposure
Pros
- Simple and affordable setup
- No electronic components
- Silent operation
Cons
- Heat may alter oil properties
- Less control over scent output
- Requires attention for safe use
5. Reed Diffusers

Reed diffusers rely on passive diffusion, where reeds absorb oil and release scent gradually into the air. Because there are no moving parts, maintenance is minimal — but scent performance depends on the condition of the reeds.
Cleaning impact
- No internal cleaning required
- Bottle may need occasional wiping
- Reeds should be replaced when saturated
Pros
- Very low maintenance
- Continuous scent without power
- Decorative and space-friendly
Cons
- Subtle scent output
- Limited control over strength
- Slower diffusion compared to active systems
How to Clean an Ultrasonic Diffuser

Because ultrasonic diffusers use both water and essential oils, residue can collect inside the tank and on the ultrasonic plate. Regular cleaning keeps mist output strong and prevents that slightly musty smell that develops when stale oil sits in the tank.
Step 1. Unplug and Empty the Reservoir
Turn off and unplug the diffuser, then pour out any remaining water. This prevents leftover liquid from interfering with the cleaning process and makes it safer to handle.
Step 2. Wipe the Inside with a Soft Cloth
Use a soft cloth or tissue to gently wipe the inside of the tank. This removes the bulk of oil residue and prevents buildup that can affect mist quality over time.
Step 3. Clean the Ultrasonic Plate or Chip
Use a cotton swab lightly dampened with white vinegar or rubbing alcohol to clean the ultrasonic plate. This is the most important step — residue on the plate is the most common cause of weak mist output.
Step 4. Rinse and Dry Before the Next Use
Rinse the tank with clean water and allow it to air dry completely before using it again. Proper drying prevents moisture buildup and keeps the diffuser running efficiently.
How to Deep-Clean Your Diffuser with White Vinegar
White vinegar is the most effective natural cleaner for ultrasonic diffusers. It dissolves mineral deposits and oil residue without damaging the plastic or ceramic components. Use this method for your regular deep-clean — about 10 minutes of hands-on work, plus drying time before the next session.
- Empty any remaining water from the tank and unplug the diffuser.
- Fill the tank halfway with clean, room-temperature water.
- Add 10 drops of white vinegar directly to the water.
- Run the diffuser for 5 minutes so the vinegar-water solution circulates through the internal components and atomizer membrane.
- Empty the tank completely and discard the solution.
- Swab the ultrasonic plate with a cotton swab lightly dampened in white vinegar — this removes any remaining film on the disc.
- Rinse once with plain water, then tilt and empty.
- Let the tank air dry completely (lid open) before the next use.
Avoid soaking the entire unit or submerging the base — the electrical components are not waterproof. A dry exterior wipe is all the outside needs.
How Often Should You Clean a Diffuser?
How often you clean a water-based ultrasonic diffuser depends on two things: how much residue builds up while it runs, and how long oil and water sit still between sessions. Heavy use builds residue faster, so the deep-clean comes round sooner; light use means the tank can stand for days at a time, which is why it should never be left full between sessions. Emptying and drying the tank after each session is the habit that prevents most problems — here is the fallback cadence for the times you skip it:
| How often you use it | Quick wipe | Vinegar deep-clean |
|---|---|---|
| Daily (every day) | Every 3–5 uses | Once a week |
| Regular (3–4× per week) | After each session | Once a month |
| Occasional (once a week or less) | After every use | After every use or when switching oils |
If you switch between very different oils — say, a heavy resinous oil like frankincense followed by a light citrus like sweet orange — run a quick vinegar cycle between them to prevent scent bleed.

Handcrafted ceramic essential oil diffuser for bedroom and sleep: quieter than a whisper (27.3 dB, lab-test...
Cleaning Scentreat Diffusers: Ceramic, Wood, Night Light and CalmRide
The four Scentreat models split into two routines. The water-based ultrasonic diffusers follow the wipe-and-vinegar cadence above; the waterless ones never see water or vinegar at all.
| Model | Type | After each session | Deep-clean | Never |
|---|---|---|---|---|
| Ceramic & Rubber Wood Diffuser | Ultrasonic, 180 ml tank | Empty, wipe the smooth reservoir with a dry cloth, leave the ceramic cover off to dry | 10 drops white vinegar in a half-full tank, run 5 minutes, swab the plate — weekly with daily use, monthly with 3–4 sessions a week | Submerge the base; leave water standing overnight |
| Minimalist Wood Diffuser | Ultrasonic, 200 ml tank | Same wipe-out; wipe any splash off the wood base straight away | Same vinegar cycle | Soak the wood housing; use bleach or citrus cleaners on the wood |
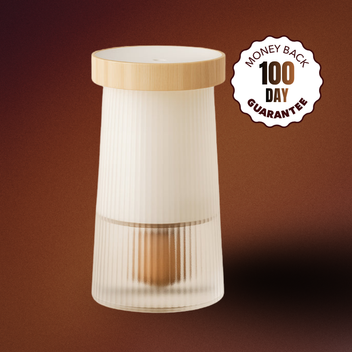
| Waterless Ceramic Diffuser & Night Light | Dual: waterless on a 5–15 ml oil bottle (up to 40 h), or 120 ml liquid mode (6–8 h) | Waterless mode: nothing — unscrew the bottle. Liquid mode: empty and wipe like the ultrasonic models | Rubbing-alcohol swab of the atomizer when you switch oils or the output weakens (waterless steps below); vinegar cycle only after liquid mode | Run vinegar through the waterless path |
| CalmRide Portable Diffuser | Waterless, 10–20 ml oil bottle, up to 60 h per charge | Nothing — unscrew the bottle when you change scents | Alcohol swab of the atomizer, same as the Night Light | Add water or vinegar |
What Not to Use to Clean Your Diffuser
A few common cleaning products will actually damage your diffuser. Avoid these entirely:
- Dish soap — it leaves a surfactant film on the atomizer membrane that reduces mist output over time and can cause the unit to gurgle.
- Bleach or harsh solvents — these damage plastic housing and rubber seals, and bleach fumes mixed with essential oils create an unpleasant and potentially irritating combination.
- Submerging the base in water — the electrical components (motor, circuit board) are not waterproof. Always clean the tank only; wipe the exterior with a damp cloth.
- Abrasive scrubbers or stiff brushes — these scratch the interior surface and the ultrasonic plate, making residue harder to clean in future sessions.
Oils to Avoid Leaving to Sit in Your Diffuser
Not all essential oils behave the same way between uses. Some oils are thicker, stickier, or more prone to oxidation — and if left sitting in a warm tank, they can gum up the atomizer plate or create a rancid smell.
Empty the tank and do a quick wipe after using these:
- Resinous and thick oils — frankincense, myrrh, vetiver, patchouli. These are viscous and cool into a sticky residue quickly.
- Citrus oils — lemon, sweet orange, bergamot. They oxidize faster than most oils and can leave an off-smell if left standing.
- Spice and bark oils — cinnamon, clove, black pepper. These are high in phenols and can degrade plastic components with prolonged contact.
- Any blend you won't use again the same day — mixing oils in the tank and leaving them overnight means they interact as they cool, often producing an unpleasant mixed scent for the next run.
Lighter, cleaner oils like lavender, eucalyptus, and peppermint are more forgiving if you occasionally skip the post-session wipe — but the cleanest habit is always to empty and dry after every session. One caveat that has nothing to do with residue: skip eucalyptus and peppermint entirely if there is a child under 2 in the home, and if you live with a cat, run them only in a ventilated room the cat can leave on its own. Lavender is the safer default in both cases.
Cordless diffuser and warm night light in one: runs waterless up to 40 hours on one oil bottle, no tank to ...
How to Clean a Nebulizing or Waterless Diffuser

Cleaning a nebulizing diffuser requires a bit more care because it uses pure essential oil, which can leave residue inside the system more quickly.
Step 1. Remove Any Remaining Oil
Empty any leftover oil from the reservoir before cleaning. This prevents mixing old residue with cleaning liquid.
Step 2. Add Rubbing Alcohol
Pour a small amount of rubbing alcohol into the container. Alcohol dissolves oil residue that water alone cannot remove.
Step 3. Run the Diffuser for a Few Minutes
Turn on the diffuser briefly to allow the alcohol to circulate through internal components — this cleans areas that are difficult to reach manually.
Step 4. Empty and Let It Dry
Discard the alcohol and let the diffuser air dry completely before the next use.
How to Clean an Evaporative or Fan Diffuser

Evaporative diffusers are relatively simple to maintain. Most cleaning involves replacing used parts and keeping the outer housing clean.
Step 1. Remove and Replace the Pad or Filter
Take out the used pad or filter and replace it if needed. Over time, these components absorb oil and lose effectiveness.
Step 2. Wipe the Exterior and Housing
Use a dry or slightly damp cloth to clean the outer surface. This prevents oil residue from building up around the diffuser.
Step 3. Let All Parts Dry Fully
Ensure all components are completely dry before reassembling. Dry parts help maintain consistent airflow and scent performance.
Handcrafted ceramic essential oil diffuser for bedroom and sleep: quieter than a whisper (27.3 dB, lab-test...
How to Clean a Heat or Candle Diffuser

Heat diffusers require careful cleaning due to the way oils warm and can leave behind thicker residue. Regular maintenance keeps the surface clean and prevents buildup over time.
Step 1. Let the Diffuser Cool Completely
Always allow the diffuser to cool before cleaning. This ensures safety and prevents damage to the surface.
Step 2. Remove Leftover Oil or Waxy Residue
Use a soft cloth or tissue to wipe away any remaining oil or residue. Heat can cause oils to thicken, so regular cleaning is important.
Step 3. Wipe the Bowl Clean Before Reuse
Clean the bowl thoroughly before using it again. This helps maintain a cleaner scent and prevents mixing old residue with new oil.
How to Clean a Reed Diffuser

Reed diffusers are one of the easiest types to maintain. Maintenance focuses on keeping the oil clean and the reeds functioning properly.
Step 1. Wipe the Bottle Neck
Use a cloth or tissue to clean any oil residue around the bottle opening. This prevents buildup that can affect how evenly the scent is released.
Step 2. Replace Old Reeds When Needed
Over time, reeds become saturated and less effective at diffusing scent. Replacing them restores consistent fragrance output.
Step 3. Clean Spills Around the Container
Wipe away any oil spills or residue around the diffuser. This keeps the area clean and prevents long-term buildup.
Five Cleaning Mistakes That Shorten a Diffuser's Life
- Leaving water in the tank between sessions. Standing water with an oil film on top is the most common cause of a diffuser that smells musty. Empty and dry, every time.
- Scrubbing the ultrasonic plate. The small metal disc is what makes the mist; an abrasive pad or a fingernail scratches it and the mist thins for good. A vinegar-dampened cotton swab is all it needs.
- Using dish soap or bleach in the tank. Soap leaves a film that foams on the plate; bleach attacks the plastic and the rubber seals. White vinegar is the only cleaner the tank needs.
- Running vinegar through a waterless diffuser. Nebulizing and waterless units atomize neat oil; vinegar or water in that path clogs the glass or the atomizer. Use rubbing alcohol, as in the waterless section below.
- Refilling straight after rinsing. A tank that is still wet dilutes the next session's oil and lets residue set in the corners. Give it the lid-off air-dry the vinegar method ends with.
Signs Your Diffuser Needs Cleaning

Even with a consistent routine, your diffuser will give clear signals when it needs attention. Catching these early prevents performance issues and keeps your scent experience consistent.
1. Weak Mist Output
A drop in mist output is almost always a dirty ultrasonic plate. Oil residue and mineral deposits reduce vibration efficiency and block proper mist flow.
2. Strange or Off Smells
A well-maintained diffuser should only smell like what you put in it. If the scent becomes musty, sour, or off, leftover residue or stagnant water is the most likely culprit.
3. Oil Buildup or Residue
Visible oil film inside the tank is a clear sign that cleaning is overdue. This buildup affects both scent quality and overall performance over time.
4. A Dirty Ultrasonic Plate or Clogged Nozzle
On an ultrasonic diffuser, a plate that looks cloudy or filmed over is what weak mist output looks like up close — swab it before it costs you a session. On a nebulizing diffuser there is no plate: the part that clogs is the narrow nozzle, and you will see it spit, sputter, or stop atomizing altogether. Both respond to the same treatment — dissolve the residue (white vinegar on the plate, rubbing alcohol through the nozzle) rather than scraping it off.
Why Choose the Scentreat Essential Oil Diffuser
The Ceramic & Rubber Wood Diffuser is built for users who want consistent performance and an easy cleaning routine. Ultrasonic technology delivers a smooth, even mist, and the ceramic cover lifts straight off to expose a smooth-walled BPA-free ABS + PP reservoir — so a wipe-out takes seconds, with no scrubbing and no complicated disassembly.
Whether you're new to essential oil diffusers or use one daily, it offers a reliable and low-maintenance experience that works as well on day 200 as it did on day one.
Key Features
- Balanced ultrasonic diffusion — soft, even mist that distributes scent consistently without becoming overpowering
- Easy-to-clean ceramic interior — smooth inner surfaces help reduce oil residue buildup, making regular cleaning faster
- Accessible ultrasonic plate — easy to reach for the vinegar swab step without complicated disassembly
- Durable rubber wood and ceramic design — built for regular use while maintaining consistent performance over time
- Whisper-quiet operation — suitable for sleep, work, and everyday environments
Main Benefits
- Consistent mist output with minimal performance drop over time
- Reduced oil buildup for a cleaner, fresher scent experience
- Quick and simple cleaning routine — no special tools needed
- Reliable daily use with low maintenance effort
For everyday operation rather than maintenance, see How to Use an Essential Oil Diffuser — Easy Step-by-Step Guide. And if you're comparing options before buying, our breakdown of how much an essential oil diffuser costs is a useful next read.
Knowing how to clean your diffuser — and how often — keeps both performance and scent quality consistent over time. A ceramic and rubber wood diffuser with a smooth-walled reservoir makes that routine even faster. We cover complementary tips in Are Essential Oil Diffusers Safe? What You Need to Know. For reference while you clean: Scentreat's Ceramic & Rubber Wood Diffuser is 129 × 129 × 237 mm, with a lift-off ceramic cover over a smooth-walled BPA-free ABS + PP reservoir.
Frequently Asked Questions
How often should I clean my diffuser?
For daily use: a quick wipe every 3–5 uses and a white-vinegar deep-clean once a week. For regular use (3–4× per week): wipe after each session and deep-clean monthly. Occasional users should clean thoroughly after every use, especially when switching oils.
Can I use vinegar to clean a diffuser?
Yes — white vinegar is the go-to method. Fill the tank halfway with water, add 10 drops of white vinegar, run for 5 minutes, then empty and swab the ultrasonic plate with a vinegar-dampened cotton swab. Rinse once with plain water and let it dry completely.
If a cat is dozing nearby while the diffuser runs, leave the door open so the animal can walk out — cats lack glucuronyl transferase, the liver enzyme that clears the phenols and monoterpenes in essential oils. A dog can usually share the room without trouble, but essential oil should never go onto an animal's coat, paws or bedding, and never into its water bowl.
What happens if I don't clean my diffuser?
Oil and mineral residue builds up on the ultrasonic plate, reducing mist output and causing musty or off smells. Over time, heavy buildup can permanently affect performance or shorten the lifespan of the unit.
Can I use soap to clean a diffuser?
Avoid dish soap — it leaves a surfactant film on the atomizer membrane that reduces mist output and can cause gurgling. White vinegar and rubbing alcohol are the safest and most effective cleaning agents for diffuser internals.
Why is my diffuser not producing mist?
The most common cause is residue buildup on the ultrasonic plate. Unplug the unit, swab the plate with a vinegar-dampened cotton swab, rinse, and let it dry fully. If mist is still weak after cleaning, check that the water level is within the max fill line.
Which oils should I avoid leaving in the diffuser?
Empty the tank after using thick or fast-oxidizing oils: frankincense, myrrh, vetiver, patchouli, citrus oils (lemon, orange, bergamot), and spice oils (cinnamon, clove). These can gum up the atomizer plate or develop an off-smell if left sitting between sessions.

